In this guide, we’ll walk you through the steps to customize an Aspire sample JavaScript project to add React TypeScript, focusing on how to integrate React TypeScript into the AspireJavaScript project.
Prerequisites
Before we start, ensure you have set up the .net 8 environment.
To work with .NET Aspire, you need the following installed locally:
- .NET 8.0
- .NET Aspire workload:
- Installed with the Visual Studio installer or the .NET CLI workload.
- An OCI-compliant container runtime, such as:
- Docker Desktop or Podman.
- An Integrated Developer Environment (IDE) or code editor, such as:
- Visual Studio 2022 version 17.10 or higher (Optional)
- Visual Studio Code (Optional)
- C# Dev Kit: Extension (Optional)
Setting Up Your Project AspireJavascript Project
First, clone the Aspire sample JavaScript project from the repository:
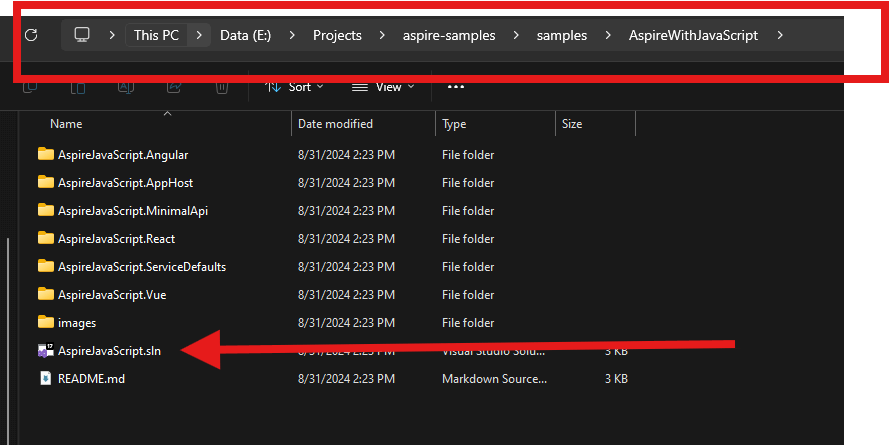
git clone https://github.com/dotnet/aspire-samplesOpen the solution by double click on AspireJavaScript.sln in samples\AspireJavaScript folder as shown in the image below.
It will look like this after the project is loaded in Visual Studio.

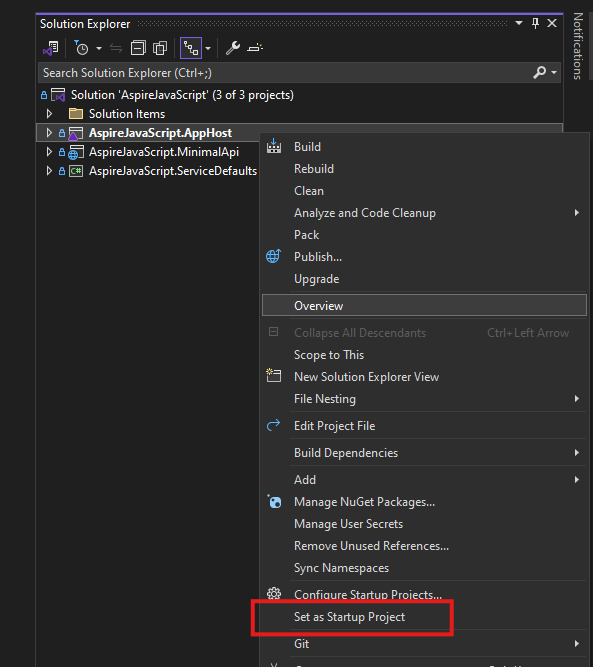
Now right-click on AspireJavaScript.AppHost the project and set it as startup.
Run the project and it should work as shown in the aspire dashboard below.
Browse the frontend applications React, Angular, Vue by clicking on the localhost URL next to each.

Setting Up React Typescript Vite in AspireJavascript Sample project using Visual Studio 2022
Next, we will be setting up the react typescript project (vite project from Visual Studio 2022 templates) in the existing AspireJavascript project we set up above.
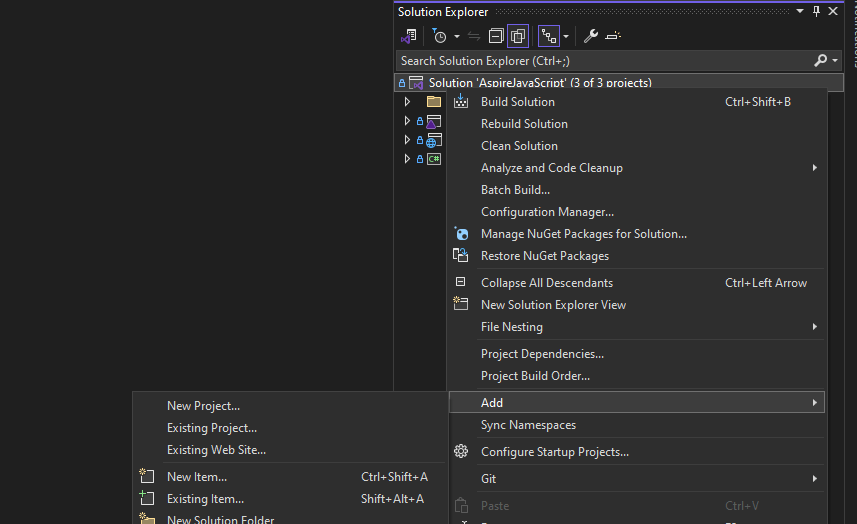
Right-click on Solution and click on Add > New Project
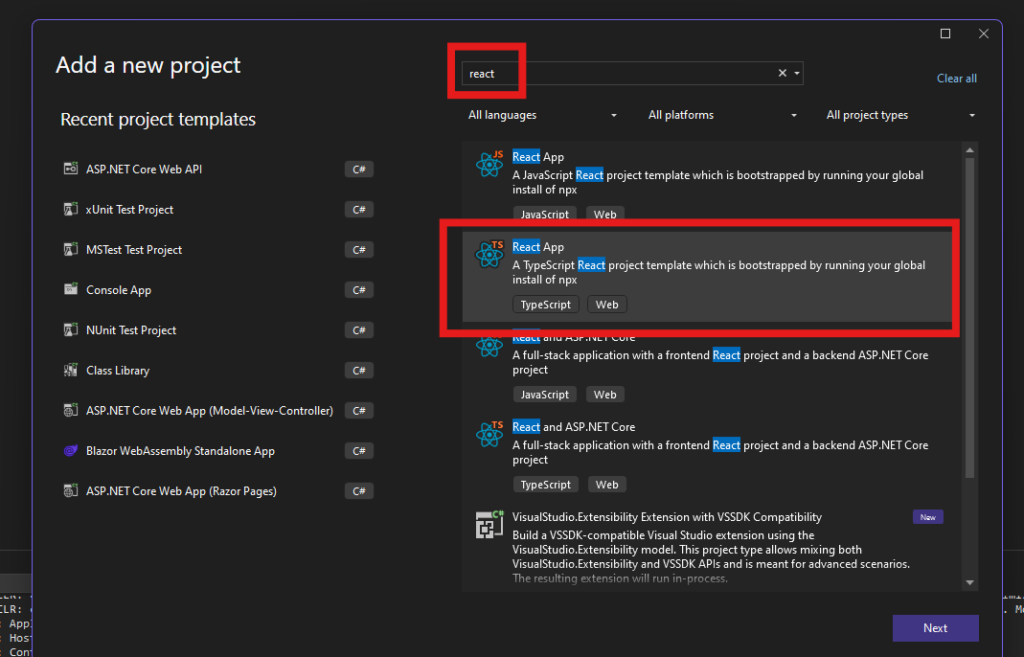
Type react in the search box and select React Typescript project from the list.
Choose the name of the React Typescript project and click next.
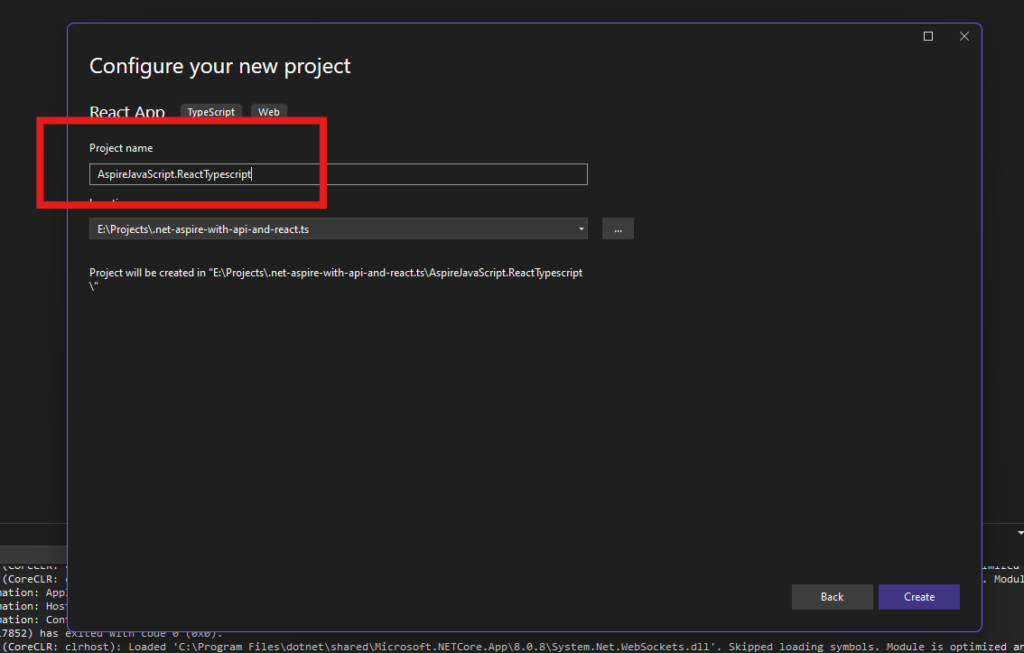
The react typescript project as added successfully now we have to change some configurations to automatically run the project with the aspire dashboard.
AppHost Project
Open Program.cs file in the AppHost project and add the below code snippet.
builder.AddNpmApp("reacttypescript", "../AspireJavaScript.ReactTypescript")
    .WithReference(weatherApi)
    .WithHttpEndpoint(env: "PORT")
    .WithExternalHttpEndpoints();
Final change in Program.cs the file will look like
var builder = DistributedApplication.CreateBuilder(args);

var weatherApi = builder.AddProject<Projects.AspireJavaScript_MinimalApi>("weatherapi")
    .WithExternalHttpEndpoints();

builder.AddNpmApp("angular", "../AspireJavaScript.Angular")
    .WithReference(weatherApi)
    .WithHttpEndpoint(env: "PORT")
    .WithExternalHttpEndpoints()
    .PublishAsDockerFile();

builder.AddNpmApp("react", "../AspireJavaScript.React")
    .WithReference(weatherApi)
    .WithEnvironment("BROWSER", "none") // Disable opening browser on npm start
    .WithHttpEndpoint(env: "PORT")
    .WithExternalHttpEndpoints()
    .PublishAsDockerFile();

builder.AddNpmApp("vue", "../AspireJavaScript.Vue")
    .WithReference(weatherApi)
    .WithHttpEndpoint(env: "PORT")
    .WithExternalHttpEndpoints()
    .PublishAsDockerFile();

builder.AddNpmApp("reacttypescript", "../AspireJavaScript.ReactTypescript")
    .WithReference(weatherApi)
    .WithHttpEndpoint(env: "PORT")
    .WithExternalHttpEndpoints();

builder.Build().Run();
Let’s run the project and you will see you have successfully added the react typescript project in the Aspire dashboard.

Wait, the project is added but there is an error🤔 right? Here are the logs of that error.
2024-08-31T10:51:36.4960000 npm error Missing script: "start"
2024-08-31T10:51:36.4960000 npm error
2024-08-31T10:51:36.4960000 npm error Did you mean one of these?
2024-08-31T10:51:36.4960000 npm error   npm star # Mark your favorite packages
2024-08-31T10:51:36.4960000 npm error   npm stars # View packages marked as favorites
2024-08-31T10:51:36.4960000 npm error
2024-08-31T10:51:36.4960000 npm error To see a list of scripts, run:
2024-08-31T10:51:36.4960000 npm error   npm run
2024-08-31T10:51:36.5170000 npm error A complete log of this run can be found in: LogFilePath
Fixing npm error Missing script: “start” AspireDashboard Error
Let’s open package.json the file in the ReactTypescript project. And change "dev": "vite" to "start": "vite" in the script section. It will look like this after the change.
"scripts": {
  "start": "vite",
  "build": "tsc -b && vite build",
  "lint": "eslint .",
  "preview": "vite preview"
},
Let’s run the project again after saving the package.json file.
You can see react typescript project is built successfully and running.

Now click on the log button next to react typescript. You can see the localhost URL where the react typescript project is running.
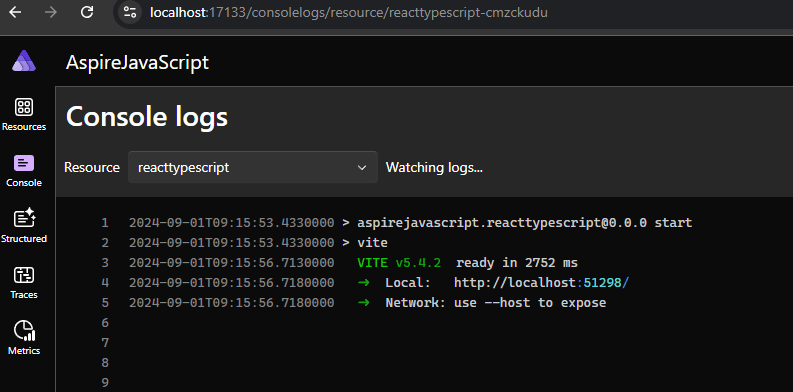
Infinite Loading issue
But we don’t want the react typescript project to run on that port instead we want it to run on a port that is exposed in the Aspire Dashboard. Right? If click on that port, it will keep loading infinitely.
Run React Typescript project on Aspire Dashboard Port
Let’s fix the infinite loading issue as well.
Open the package.json file in the ReactTypescript project. and change "start": "vite" to "start": "vite --port %port%" in the script section. The final change will look like this.
"scripts": {
  "start": "vite --port %port%",
  "build": "tsc -b && vite build",
  "lint": "eslint .",
  "preview": "vite preview"
},
Save and run the project. Click on on localhost URL next to reacttypescript
And should be working as shown in the image below.
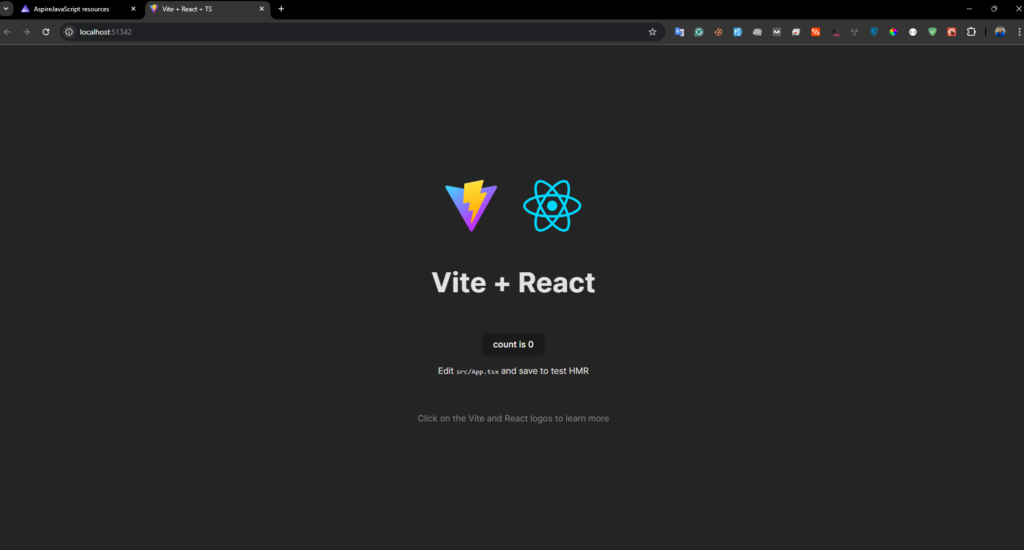
How to Consume Aspire Api in React Typescript Project
We successfully configured the react typescript project into the Aspire dashboard. But we missed one thing. We also want to consume Aspire API into our react typescript project. To do that we have to change in three files.
aspire-manifest.jsonvite.config.tsApp.tsx
Change Aspire Manifest (aspire-manifest.json )
First open aspire-manifest.json file in AppHost Project and add the below script into resource section.
"reacttypescript": {
  "type": "dockerfile.v0",
  "path": "../AspireJavaScript.ReactTypescript/Dockerfile",
  "context": "../AspireJavaScript.ReactTypescript",
  "env": {
    "NODE_ENV": "production",
    "REACTTYPESCRIPT_APP_WEATHER_API_HTTP": "{weatherapi.bindings.http.url}",
    "REACTTYPESCRIPT_APP_WEATHER_API_HTTPS": "{weatherapi.bindings.https.url}",
    "PORT": "{react.bindings.http.targetPort}"
  },
  "bindings": {
    "http": {
      "scheme": "http",
      "protocol": "tcp",
      "transport": "http",
      "targetPort": 8001,
      "external": true
    }
  }
}
The final change in the file will look like this.
{
  "resources": {
    "weatherapi": {
      "type": "project.v0",
      "path": "../AspireJavaScript.MinimalApi/AspireJavaScript.MinimalApi.csproj",
      "env": {
        "OTEL_DOTNET_EXPERIMENTAL_OTLP_EMIT_EXCEPTION_LOG_ATTRIBUTES": "true",
        "OTEL_DOTNET_EXPERIMENTAL_OTLP_EMIT_EVENT_LOG_ATTRIBUTES": "true",
        "OTEL_DOTNET_EXPERIMENTAL_OTLP_RETRY": "in_memory",
        "ASPNETCORE_FORWARDEDHEADERS_ENABLED": "true"
      },
      "bindings": {
        "http": {
          "scheme": "http",
          "protocol": "tcp",
          "transport": "http"
        },
        "https": {
          "scheme": "https",
          "protocol": "tcp",
          "transport": "http"
        }
      }
    },
    "angular": {
      "type": "dockerfile.v0",
      "path": "../AspireJavaScript.Angular/Dockerfile",
      "context": "../AspireJavaScript.Angular",
      "env": {
        "NODE_ENV": "production",
        "services__weatherapi__http__0": "{weatherapi.bindings.http.url}",
        "services__weatherapi__https__0": "{weatherapi.bindings.https.url}",
        "PORT": "{angular.bindings.http.targetPort}"
      },
      "bindings": {
        "http": {
          "scheme": "http",
          "protocol": "tcp",
          "transport": "http",
          "targetPort": 8000,
          "external": true
        }
      }
    },
    "react": {
      "type": "dockerfile.v0",
      "path": "../AspireJavaScript.React/Dockerfile",
      "context": "../AspireJavaScript.React",
      "env": {
        "NODE_ENV": "production",
        "REACT_APP_WEATHER_API_HTTP": "{weatherapi.bindings.http.url}",
        "REACT_APP_WEATHER_API_HTTPS": "{weatherapi.bindings.https.url}",
        "PORT": "{react.bindings.http.targetPort}"
      },
      "bindings": {
        "http": {
          "scheme": "http",
          "protocol": "tcp",
          "transport": "http",
          "targetPort": 8001,
          "external": true
        }
      }
    },
    "vue": {
      "type": "dockerfile.v0",
      "path": "../AspireJavaScript.Vue/Dockerfile",
      "context": "../AspireJavaScript.Vue",
      "env": {
        "NODE_ENV": "production",
        "VITE_WEATHER_API_HTTP": "{weatherapi.bindings.http.url}",
        "VITE_WEATHER_API_HTTPS": "{weatherapi.bindings.https.url}",
        "PORT": "{vue.bindings.http.targetPort}"
      },
      "bindings": {
        "http": {
          "scheme": "http",
          "protocol": "tcp",
          "transport": "http",
          "targetPort": 8002,
          "external": true
        }
      }
    },
    "reacttypescript": {
      "type": "dockerfile.v0",
      "path": "../AspireJavaScript.ReactTypescript/Dockerfile",
      "context": "../AspireJavaScript.ReactTypescript",
      "env": {
        "NODE_ENV": "production",
        "REACTTYPESCRIPT_APP_WEATHER_API_HTTP": "{weatherapi.bindings.http.url}",
        "REACTTYPESCRIPT_APP_WEATHER_API_HTTPS": "{weatherapi.bindings.https.url}",
        "PORT": "{react.bindings.http.targetPort}"
      },
      "bindings": {
        "http": {
          "scheme": "http",
          "protocol": "tcp",
          "transport": "http",
          "targetPort": 8001,
          "external": true
        }
      }
    }
  }
}
Change Vite Config (vite.config.ts )
Next, open vite.config.ts the file in ReactTypescript the project and replace all content with the below script.
import { defineConfig } from 'vite'
import react from '@vitejs/plugin-react'

// https://vitejs.dev/config/
export default defineConfig({
    plugins: [react()],
    server: {
        port: parseInt(process.env.PORT) || 4001,
        proxy: {
            '/api': {
                target: process.env.services__weatherapi__https__0 ||
                process.env.services__weatherapi__http__0,
                changeOrigin: true,
                rewrite: (path) => path.replace(/^\/api/, ''),
                secure: false,
            },
        },
    },
    build: {
        outDir: 'dist',
    },
})
The server block configures the development server:
port: parseInt(process.env.PORT) || 4001:- This sets the server port, using the environment variable
PORT(if defined), otherwise defaulting to4001.
- This sets the server port, using the environment variable
proxy: Theproxyconfiguration is set to forward API requests during development to avoid CORS issues./api: Any request starting with/apiwill be proxied to another server.target: process.env.services__weatherapi__https__0 || process.env.services__weatherapi__http__0- This dynamically sets the proxy target based on environment variables, allowing different backend API URLs (e.g., for HTTP or HTTPS).
changeOrigin: true: Ensures the host header sent to the target matches the target’s URL.rewrite: (path) => path.replace(/^\/api/, ''): This rewrites the path, removing/apifrom the beginning of the request before it’s sent to the proxy server.secure: false: This disables SSL certificate verification for proxied requests, useful if the target API uses a self-signed certificate.
Consume Api
We updated configurations to consume API in react typescript project. Next, open App.tsx file in ReactTypescript project and place below script.
/* eslint-disable no-debugger */
import { useState, useEffect } from 'react'
import reactLogo from './assets/react.svg'
import viteLogo from '/vite.svg'
import './App.css'

function App() {
  const [count, setCount] = useState(0)
    const [forecasts, setForecasts] = useState([]);

    const requestWeather = async () => {
        const weather = await fetch("api/weatherforecast");
        debugger
        console.log(weather);

        const weatherJson = await weather.json();
        console.log(weatherJson);

        setForecasts(weatherJson);
    };

    useEffect(() => {
        requestWeather();
    }, []);

  return (
    <>
      <div>
        <a href="https://vitejs.dev" target="_blank">
          <img src={viteLogo} className="logo" alt="Vite logo" />
        </a>
        <a href="https://react.dev" target="_blank">
          <img src={reactLogo} className="logo react" alt="React logo" />
        </a>
      </div>
      <h1>Vite + React</h1>
      <div className="card">
        <button onClick={() => setCount((count) => count + 1)}>
          count is {count}
        </button>
        <p>
          Edit <code>src/App.tsx</code> and save to test HMR
        </p>
      </div>
      <p className="read-the-docs">
        Click on the Vite and React logos to learn more
          </p>
          <div className="App">
              <header className="App-header">
                  <h1>React Weather</h1>
                  <table>
                      <thead>
                          <tr>
                              <th>Date</th>
                              <th>Temp. (C)</th>
                              <th>Temp. (F)</th>
                              <th>Summary</th>
                          </tr>
                      </thead>
                      <tbody>
                          {(
                              forecasts ?? [
                                  {
                                      date: "N/A",
                                      temperatureC: "",
                                      temperatureF: "",
                                      summary: "No forecasts",
                                  },
                              ]
                          ).map((w) => {
                              return (
                                  <tr key={w.date}>
                                      <td>{w.date}</td>
                                      <td>{w.temperatureC}</td>
                                      <td>{w.temperatureF}</td>
                                      <td>{w.summary}</td>
                                  </tr>
                              );
                          })}
                      </tbody>
                  </table>
              </header>
          </div>
    </>
  )
}

export default App
Save the file and run the project. After run project click on localhost URL next to react typescript project in Aspire dashboard. You should see the screen as shown in image below.
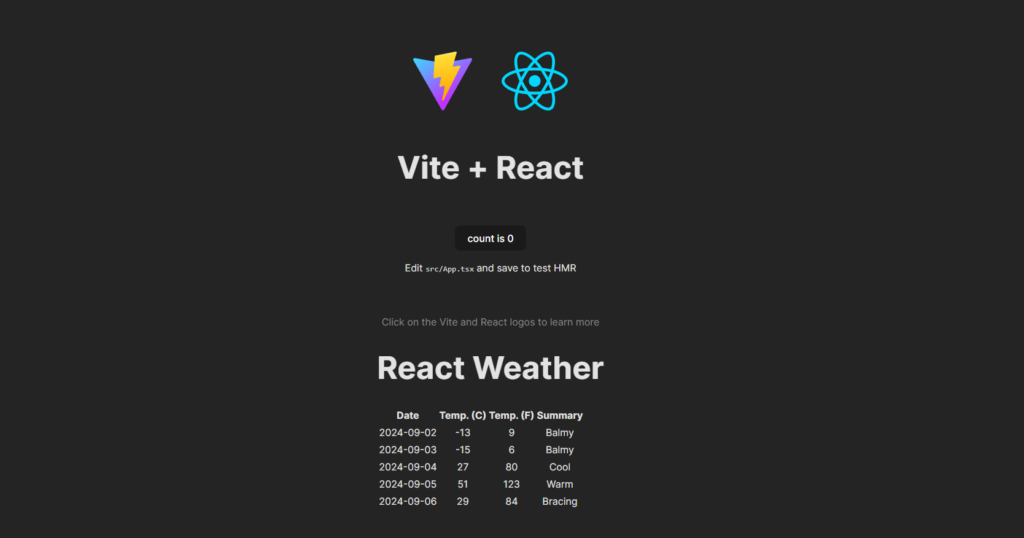
Congratulations! You have successfully configured the React TypeScript project within the existing AspireJavaScript template. The project should now be running on the specified port in the Aspire Dashboard.
I’ve set up a GitHub repository with branches for each step. In each branch, you can view the commit details and see the differences between files for that specific step.

